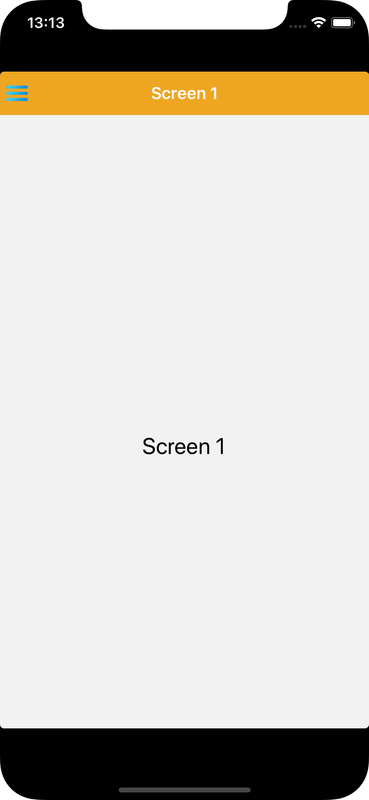
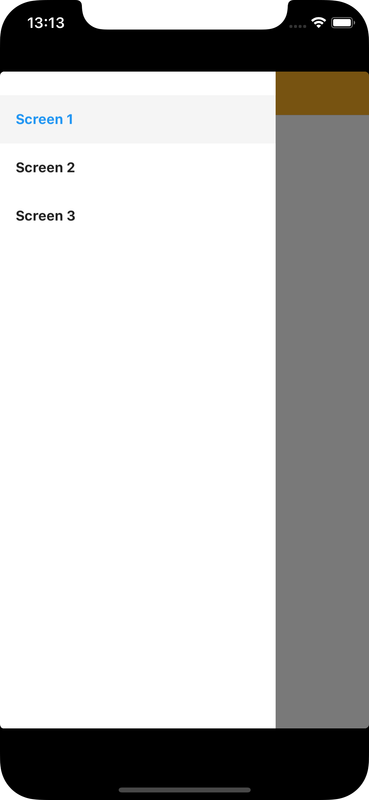
Navigation Drawer allows to manage a number of app options as a menu which can be pulled in and out by user
This example consists of a navigation drawer with three screen navigators
import {createAppContainer} from 'react-navigation';
import {createDrawerNavigator} from 'react-navigation-drawer';

const Drawer = createDrawerNavigator({
  Screen1: {
    screen: Screen1Navigator,
    navigationOptions: {
      drawerLabel: 'Screen 1',
    },
  },

  Screen2: {
    screen: Screen2Navigator,
    navigationOptions: {
      drawerLabel: 'Screen 2',
    },
  },

  Screen3: {
    screen: Screen3Navigator,
    navigationOptions: {
      drawerLabel: 'Screen 3',
    },
  },
});

export default createAppContainer(Drawer);
A screen navigator is a Stack Navigator created from a component (which can be a typical view component)
import {createStackNavigator} from 'react-navigation-stack';
import {Screen1, Screen2, Screen3} from './Screens';

const Screen1Navigator = createStackNavigator({
  First: {
    screen: Screen1,
    navigationOptions: ({ navigation }) => ({
      title: 'Screen 1',
      headerLeft: ()=> <NavigationDrawerStructure navigationProps={navigation} />,
      headerStyle: {
        backgroundColor: '#eea622',
      }
    }),
  }
});Check React Native Installation for installation related info
Use react-native init command to create a new React Native project (here named NavigationDrawerApp)
react-native init NavigationDrawerAppThis creates a directory named NavigationDrawerApp and initializes it as a react native application directory
This can be skipped in case an existing react native project is being integrated into
Go to project directory (here NavigationDrawerApp)
cd NavigationDrawerAppAdd react-navigation react-navigation-drawer && react-navigation-stack and associated dependencies to current project using yarn
yarn add react-navigation react-navigation-drawer react-navigation-stack \
react-native-gesture-handler react-native-reanimated react-native-safe-area-context react-native-screens \
@react-native-community/masked-view
or using npm
npm install react-navigation react-navigation-drawer react-navigation-stack \
react-native-gesture-handler react-native-reanimated react-native-safe-area-context react-native-screens \
@react-native-community/masked-view --save After yarn add command, cd into ios folder inside project directory
cd iosUse pod command to install any required CocoaPods dependencies:
pod installThis example app consists of files App.js, Screens.js and image drawer.png inside project directory
drawer.png:

Above image is stored as drawer.png inside project directory
Code for App.js and Screens.js :
import React, { Component } from 'react';
import { View, Image, TouchableOpacity } from 'react-native';
import {createAppContainer} from 'react-navigation';
import {createDrawerNavigator} from 'react-navigation-drawer';
import {createStackNavigator} from 'react-navigation-stack';
import {Screen1, Screen2, Screen3} from './Screens';
class NavigationDrawerStructure extends Component {
toggleDrawer = () => {
this.props.navigationProps.toggleDrawer();
};
render() {
return (
<View style={{ flexDirection: 'row' }}>
<TouchableOpacity onPress={this.toggleDrawer.bind(this)}>
{/*Donute Button Image */}
<Image
source={require('./drawer.png')}
style={{ width: 25, height: 25, marginLeft: 5 }}
/>
</TouchableOpacity>
</View>
);
}
}
const Screen1Navigator = createStackNavigator({
First: {
screen: Screen1,
navigationOptions: ({ navigation }) => ({
title: 'Screen 1',
headerLeft: ()=> <NavigationDrawerStructure navigationProps={navigation} />,
headerStyle: {
backgroundColor: '#eea622',
}
}),
}
});
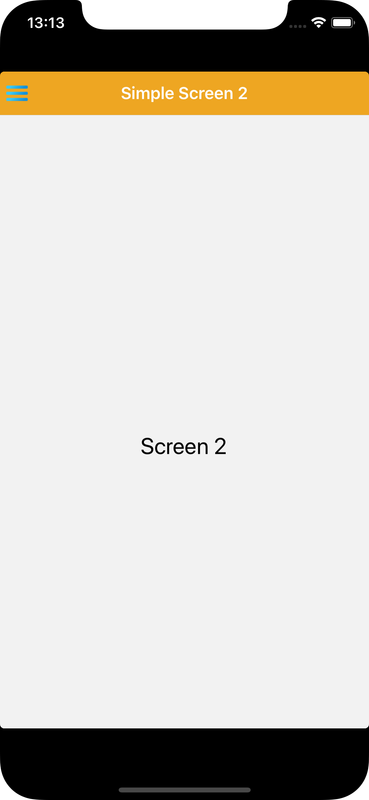
const Screen2Navigator = createStackNavigator({
Second: {
screen: Screen2,
navigationOptions: ({ navigation }) => ({
title: 'Simple Screen 2',
headerLeft: ()=> <NavigationDrawerStructure navigationProps={navigation} />,
headerStyle: {
backgroundColor: '#eea622',
}
}),
},
});
const Screen3Navigator = createStackNavigator({
Third: {
screen: Screen3,
navigationOptions: ({ navigation }) => ({
title: 'Simple Screen 3',
headerLeft: ()=> <NavigationDrawerStructure navigationProps={navigation} />,
headerStyle: {
backgroundColor: '#eea622',
}
}),
},
});
const Drawer = createDrawerNavigator({
Screen1: {
screen: Screen1Navigator,
navigationOptions: {
drawerLabel: 'Screen 1',
},
},
Screen2: {
screen: Screen2Navigator,
navigationOptions: {
drawerLabel: 'Screen 2',
},
},
Screen3: {
screen: Screen3Navigator,
navigationOptions: {
drawerLabel: 'Screen 3',
},
},
});
const DrawerNavigatorExample = createStackNavigator({
Drawer: { screen: Drawer, navigationOptions: { headerShown: false } }
});
export default createAppContainer(DrawerNavigatorExample);Some identical components to be used as screens:
import React, { Component } from 'react';
import { StyleSheet, View, Text, Button } from 'react-native';

export class Screen1 extends Component {
  render() {
    return (
      <View style={styles.screenContainer}>
        <Text style={{ fontSize: 23 }}> Screen 1 </Text>
      </View>
    );
  }
}

export class Screen2 extends Component {
  render() {
    return (
      <View style={styles.screenContainer}>
        <Text style={{ fontSize: 23 }}> Screen 2 </Text>
      </View>
    );
  }
}

export class Screen3 extends Component {
  render() {
    return (
      <View style={styles.screenContainer}>
        <Text style={{ fontSize: 23 }}> Screen 3 </Text>
      </View>
    );
  }
}

const styles = StyleSheet.create({
  screenContainer: {
    flex: 1,
    padding: 20,
    alignItems: 'center',
    marginTop: 50,
    justifyContent: 'center',
  },
});cd into project directory (here NavigationDrawerApp)
cd NavigationDrawerAppRun metro server to serve js
react-native startGo to project directory in another terminal tab
Enter following run command for Android:
react-native run-android
cd into project directory (here NavigationDrawerApp)
cd NavigationDrawerAppEnter following command :
react-native run-iosThis might take some time
If the app shows error about metro server not configured (check Running an App in iOS), then run metro server in another tab:
react-native startReload the app
Re-run react-native run-ios command if reloading doesn't work